Development Diary
Pre-submission
Before the resubmission, my B1 development diary was poor compared to the rest of the work that I had produced. It was a lazy and quick fix for one of the major parts of my work and I have now realised this. A lot of my ‘Dev Diary’ was on GitHub and to say that it was lazily wrote would be an understatement. I spent little to no time on these commits and didn’t think much of it, I now realise this and can see that I should have put more effort into this document.
Editing my work
That previous paragraph is why in this document, I will be going over all of my coding documentation to analyse in depth what each line accomplishes. I will Start with the HTML document and work my way down to CSS and then JavaScript.
Idea building
The beginning
At the beginning of b1, I was dead set on the idea that I was going to do blender. This is as it was my strongest point in the course and something that I could easily do. However, upon further research into the brief and how the project worked, I realised that I could do programming. I’m not going to lie and say that I went into this project knowing everything about how to code and how code works. Because quite frankly, I didn’t. All I knew was my passion for coding before college started and how much I was inspired in earlier education. In the beginning days of B1, unlike most of the other students in the class, I was spending all of my time in and out of college learning the fundamentals of how each coding language worked. I had spent my days making miniature websites to hone my skills and try to get them up to industry standards.
Half way
Before I knew it, we were half way through the project. My work was mediocre for research and honestly, I was giving up on myself. The half way mark turned something inside of me, it gave me newfound motivation about how I should go about this. During this I was set on the idea that I was going to be making an AI embedded application with multiple coding languages, this obviously didn’t turn out well, as it was too complex for me at the time. This was also when I started to think of new ideas for this project, I went through a few drafts of designs however, none found me as best as making my own portfolio. Around this time was also when I started my coding, I started to make the basic fundamentals of my website. This process took me a few days to perfect as it wasn’t my best code, however I was happy enough with my design.
The break - The end
Over this period of time, the winter break started this signified the last 3 weeks of the project. This in itself was good for me, I could stay home and work on my code the entire time to perfect it to my likings. Admittedly, a lot of the holiday my work ethic was rather poor compared to a lot of the work I did in class. I had my mind set on the AI writer and my code was basically completed from this point onwards. Then the day after Christmas Day I had been saved by the fact that I now have the use of a MacBook. This allowed me to work even when I was out, which is a big game changer especially since my work ethic is usually pretty bad. This break allowed for me to reset and get use to all of my new resources. Overall, this break helped me in the long run as it allowed me to reset my mind from the stress of B1 and it additionally allowed me to work in my home, which is a way better working environment for me.
HTML
Lines 1 - 16
Lines 1 - 2
The starting two lines are mostly used for the browsers. They tell the browser that the website it pushed to that the document used is HTML format, this is mostly for accessibility and ease of use when looking into the code and checking format. The second line is another accessibility line of code, this line defines the document as an english document. This feature is used by a lot of browsers for recommendation. It will push your file to people in the same language, this feature will mostly used for ‘screen-readers’ as it can tell the reader what language the document is.
Lines 3 - 12
Most of lines 3 - 12 have the same purpose. However, I’m still going to go into detail about everything I can, and describe it well. The first line(line 4) being ‘Head’, this tag defines everything below it (and up to the next head tag) in a ‘Header’ this tag will mostly be hidden unless users specifically look for it and it will only affect background tasks.
Next up is the start of many ‘Links’ this first link(on line 5) uses ‘rel’ as the first main tag. This tag is for accessibility and is used for screen-reading whenever someone scrolls over the image. Upon scrolling over this image it will say whatever is in the ‘rel’ tags, in my case ‘icon’ will be told to the reader.
Going further on this line, I can see that is displays ‘type’ this is to define to the browser the image and what type of image this is(which can be anything from JPEG to PNG).
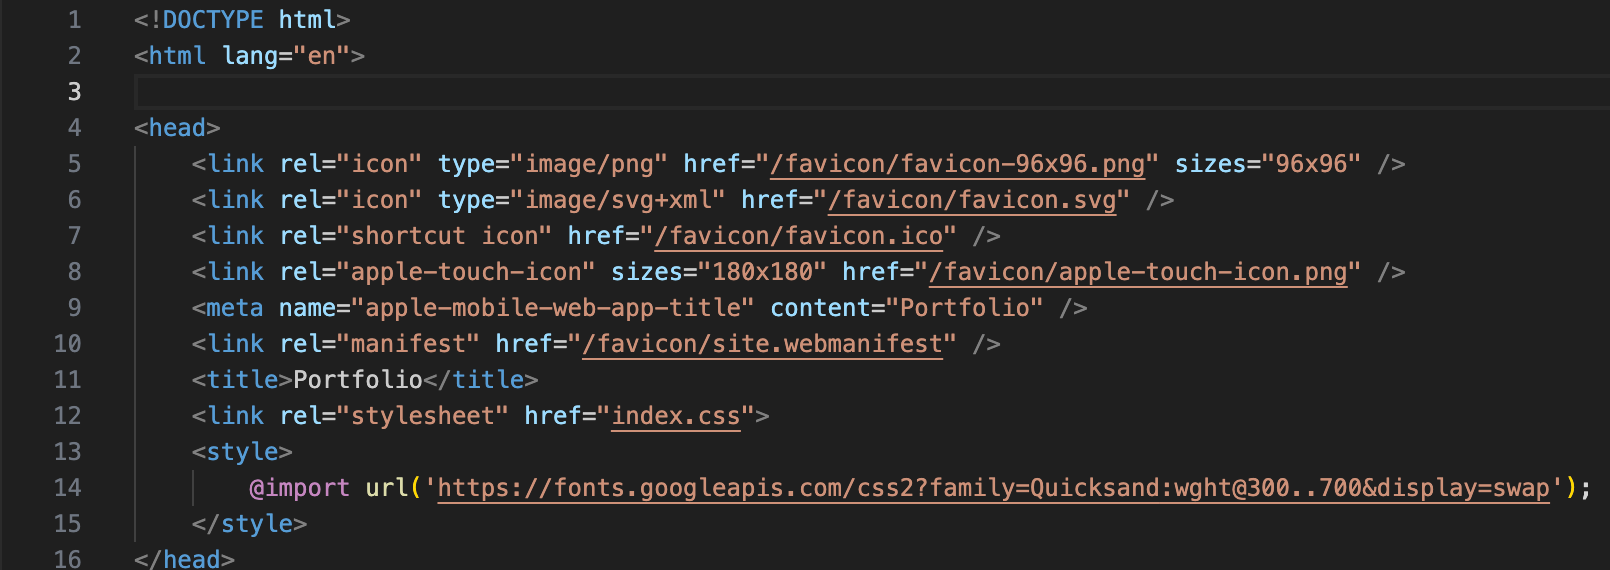
Next up is the HREF tag, this particular HREF is stating what the file name that it needs to reference is called and named in the folder. It is referencing something called a ‘Favicon’ now. If you’re not very familiar with coding ‘Favicon’ could mean absolutely nothing to you and could seem daunting. However, this is simpler than expected.
Favicon
Favicon can seem daunting, and maybe not the easiest to understand. However, I’m going to try and explain (in the best way that I can) how they work / operate. The best way I can describe favicon is by saying it is a small image(usually 32px by 32px) which operates from the top of your browser. If you were to open a web page now, you would be able to see the image of the page (the favicon) and the name of the page next to it for example Google. This would look something like this:
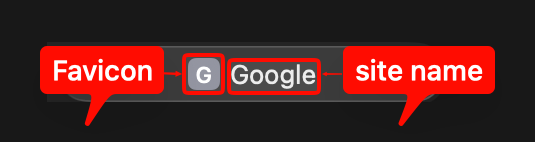
Overall, a favicon is an interchangeable image which can be changed with a simple line of code. This image is usually used for main logos on pages used by a lot of people, they are quite often then not a piece of art which is only displayed on the top of your browser window. They are usually unnoticed to someone who isn’t looking for it. The creation of a favicon should take no longer than an hour and is something very simple. Here are some examples of some popular favicon’s:
Lines 3 - 16 Continued
The next line(line 6) is also a ‘Link’ line of code, and is also a link for a favicon. This line also starts with ‘rel’ and is also defined as an ‘Icon’. So far everything in this line of code everything is the same as the previous line, which is what you will notice throughout a lot of the ‘Head’ section of my work. This slightly changes for the next section of code, the HREF stay the same by linking the same image, however the size at the end of the code isn’t defined. I had a lot of trouble trying to figure this line of code out as the favicon weren’t working before. However, after removing the size it fixed everything. If you were to ask me how this worked? I couldn’t tell you fully. However, my theory is that the picture needs to be in its normal size for at least one line of code so it has a basis to go from when converting the size down in pixels. But thats just my theory, as I couldn’t find anything directly explaining why this happened. Unfortunately, in a lot of coding this is also the case with most people lots of people all over the world have the same problem as me, they can’t explain why the code or program works. But, for some reason it does and it will run fine.
Lines 6 - 8 are all the same thing again, I don’t want to write too much about every single line of code when half of it is doing the same thing in a different font. These lines of code are specifically for other browser types to keep accessibility rates high. Overall, the code lines are still mandatory if I would like to display my website across multiple platforms and devices(which I would like to do as it could increase my overall viewership for my website). So, in the long run these lines will benefit me. However, for explaining purposes I would be dragging it on for useless lines that I can’t explain much more than I already have.
Now, I can get into the more advanced pieces of my work, The 9th line is a ‘meta’ tag in the project I used this tag once. Honestly? That was poor practice. Meta could have been used a lot more. This tag is mostly for accessibility as well as the links tab, however it works slightly different and it can hold certain content in the meta tag. This specific tag defines an app name(on apple devices) so when the app is on the Home Screen it will display the application name with the favicon. The line then has a ‘content’ tag this tag tells the browser that whatever is inside of these quotation marks is what will display when the application is on the home page(of an apple device). Let’s say I put ‘Google’ in the quotation marks, then when uploading the website ‘Google’ would appear below the favicon. Overall, this meta tag is crucial for when I could upload my website to a downloadable application on devices.
Line 10 is another ‘links’ line for the same favicon to be displayed on google devices. Im not going to go into detail on this line as I have already explained the ‘link’ section too many times.
Line 11 is a ‘title’ tag, I had a lot of problems with this tag as I couldn’t quite get it to function properly. Sometimes it would display incorrectly or sometimes it wouldn’t display at all. Eventually I had to ask one of my classmates for assistance which they then told me what I was doing wrong and how I could fix this. In short, before I was defining it with a class tag, and that class tag linked to something else in my work. So in theory it was working but it was displaying with the class, which isn’t where it needs to be. All I needed to do was remove the class tag and my code would have been perfectly fine. I then wrote down his answer and looked into this more when I got home. I found out that you don’t need to define it at all. This is what I found out about ‘Title’:
- 1: located in the head tag, so it can be a separate variable in itself
- 2: I don’t need quotation marks around the text inside as it’s a variable in itself, so everything in-between the two ‘title’ tags would appear as the title
- 3: I don’t need to over-complicate the code.
All of these points coming together gave me a higher understanding of how this, and a lot of other code works. As most of the skills and features of this singular line can be applied everywhere else in my code for more practical use.
Next is another ‘link’ line. However, this line is a lot better for explaining. Plus. It has a completely different function than the previous ones, it starts with a simple ‘rel’ and in the quotes it states ‘stylesheet’ this is pretty similar to the other lines before in the fact that it is used for accessibility and screen-reading. However, the better part of this comes in the next small tag. The HREF tag references the ‘Index.css’ file and links the two together, so the browser knows that everything past the link will be linked to the CSS document. Overall, this line of code is essential to making the code:
- A: look nice and feel professional
- B: Actually run
- C: Align all of my elements into their own separate parts
Without this singular line of code, the website wouldn’t function and it wouldn’t run nowhere near the ability that it could before.
Finally, lines 13 to 16, this function is something relatively short. Upon first glance, it looks a little more complicated from the rest of the code before. However, on further looks and descriptions on it, it isn’t that daunting. To start off line 13(and 15) we have a style definer, this definer sets everything in-between both style blocks to be added onto the stylesheet which is predefined. Next up, is line 14, this is the bigger chunk of code and can be easily explained. ’@import’ This command is as the name says importing documents from elsewhere. This can also be used for various other things than how I’m using it. However, this was the best way to do it for me. For the final chunk of this line ‘URL(Fonts)’ this is linking to that google fonts link and taking the code for it. What this will do is allow me (in CSS) to define everything under this font instead of the basic ones which VSCode allow. This is very helpful for using precise fonts to make websites stand out from everything else. Which is particularly good when trying to make something look professional and presentable. Overall, these lines of code define such a small but necessary part of this document and they help with making the entire website more professional, and more presentable.
Overall, lines 0 - 16 are some of the most essential lines of code for not only looks, but making the actual code run and function the same as it would normally. These important lines define the whole document and display perfect accessibility to people who can’t even view the document properly. These lines of code show some of the best practice that I have achieved out of all of my personal project at home and I feel that I have honed my skills perfectly here.
Lines 16 - 40
Short summary
Lines 16 - 40 are some of the more basic lines of code, in short. These lines define some of the ‘Main Features’ of the website and page. Some of these lines of code define smaller things and others will define whole paraphrases of text.
Lines 16 - 40
Starting at the very top line. Line 17, this line is the beginning of the ‘body’ tag. This tag defines (whatever is below and in-between the other body tag later down the code) everything below it as something which is located in the ‘body’ of the website and code. Before moving any further I feel that it is necessary for me to explain the layout of a generic website.
Website layout
To begin, its best I show an image of a websites layout so referencing will come from the image below:

Header
This tag defines everything at the top of the page, this may contain things like the websites logo, the favicon and slogan of a page, by base. This tag works like a normal ‘Div’ which I will explain later on in lines 16 - 40. You can easily spot most headers on websites as it is the first thing that you will usually see. Some examples of really defined headers include:
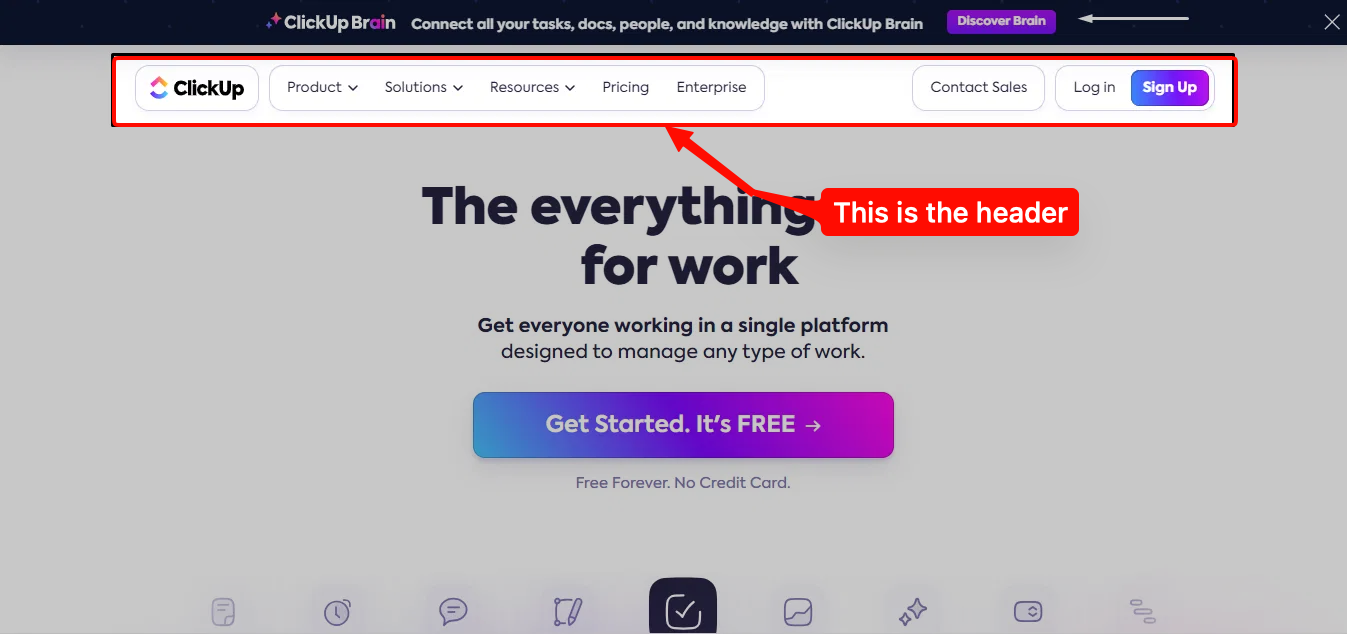
As seen in this image(and highlighted in red) you can now see the entire header section. In this example, the header is a small bar at the top of the page, it can be seem with multiple functional buttons on this. I have confirmed that this is the header tag by looking into the code itself (using inspect element). Further looking into this website I can confirm that this is very bad practice (in my opinion) if I was creating this website I would much rather place this top header in a ’Nav’ tag. Overall, this example is good and shows you how to not use the header tag. However, it does give us a good insight into how headers work and function, which is the entire point of this paragraph.
Nav
Next up is the ‘nav’ section of my work. Nav(aka navigation) is a fundamental part of every website posted onto the internet. In short, nav allows the space under the header to be placed with multiple buttons which help you navigate around the website. This bar is mostly seen at the top of a website and used at least once in a websites creation. Some examples of ‘nav’ bars in websites look like this:
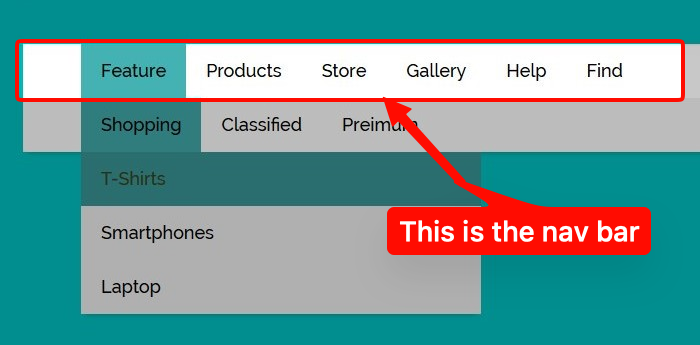
This image is a perfect example of how to use the ‘Navbar’. It is simple, fast and effective. Additionally, it is used in the perfect way as it isn’t like the last one which was using a ‘head’ tag when it should have been using ‘nav’. Overall, I have nothing to say for this image and it speaks for itself. I love everything about this ‘navbar’ and wouldn’t change anything about it.
Content
The content section of a web page is usually used sparsely, in modern website content can be seen being used less and less. In A lot of low budget websites, content is used a lot more for ad purposes. You will find, when scrolling random pages on the internet, their content tabs are rather large and seem to take up a lot of space around them. Some popular examples of this can be seen:
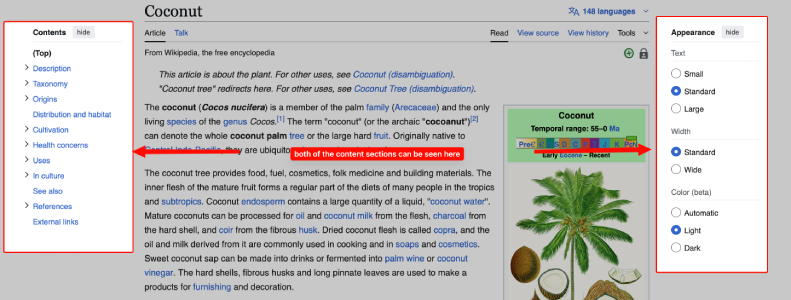
This example is a very old website called Wikipedia (no I haven’t cited from it) and this is a prime examples of old websites using a bigger content size on the page. They have a large variety of different buttons and functions on the side of the page. In theory, this was more practical and personally I like the bigger content, as I feel that it gives me more to see in the centre of the page. However, due to the popularity liking the smaller and cleaner content side it has started to disappear and blend into more websites. Overall, I feel that the content part of the page is something amazingly useful I just feel that now websites should take that and use it more.
Main Content
The next part is the ‘Main Content’ part of the page, this section of work is something that everyone has seen regardless and is usually located in the centre of the page. When you open up a webpage most of the time you will be fixed on the main content. This is why, when creating a website you need to focus on the looks of the main content, so when a user is looking upon your work they will be enticed to stay on the page longer. Some examples I have found are:

This image shows exactly where the main content part of the page is. Not to be confused by the image next to it with a description as it is a part of the content section. I like this main content as it shows me exactly what I want to see on the page. In my opinion I feel that main content now is being used as a side part of the page instead of the main part of it. I believe that the looks are better and its feels easier to read in this format and is why I will continue to base my formatting from it. Overall, I like this formatting and the way of showing the main content of the page as I believe it is the easiest way to display work.
Footer
For the final part of websites that I’m going to go over, I have the footer. This part of the website is something which is used to display a lot of the information located on the bottom of a page, this can display peoples other platforms e.g. Youtube, X etc. sometimes the footer will even show things like legal information and copyright information. Like a lot of the other parts of websites, the footer will be something that won’t disappear or fade out of popularity anytime soon. This is as the footer hold a lot of information about a website and is the standard for web creation now. Without a footer a lot of legal troubles could come for websites and recognition could also be a lot harder than if they weren’t using one.
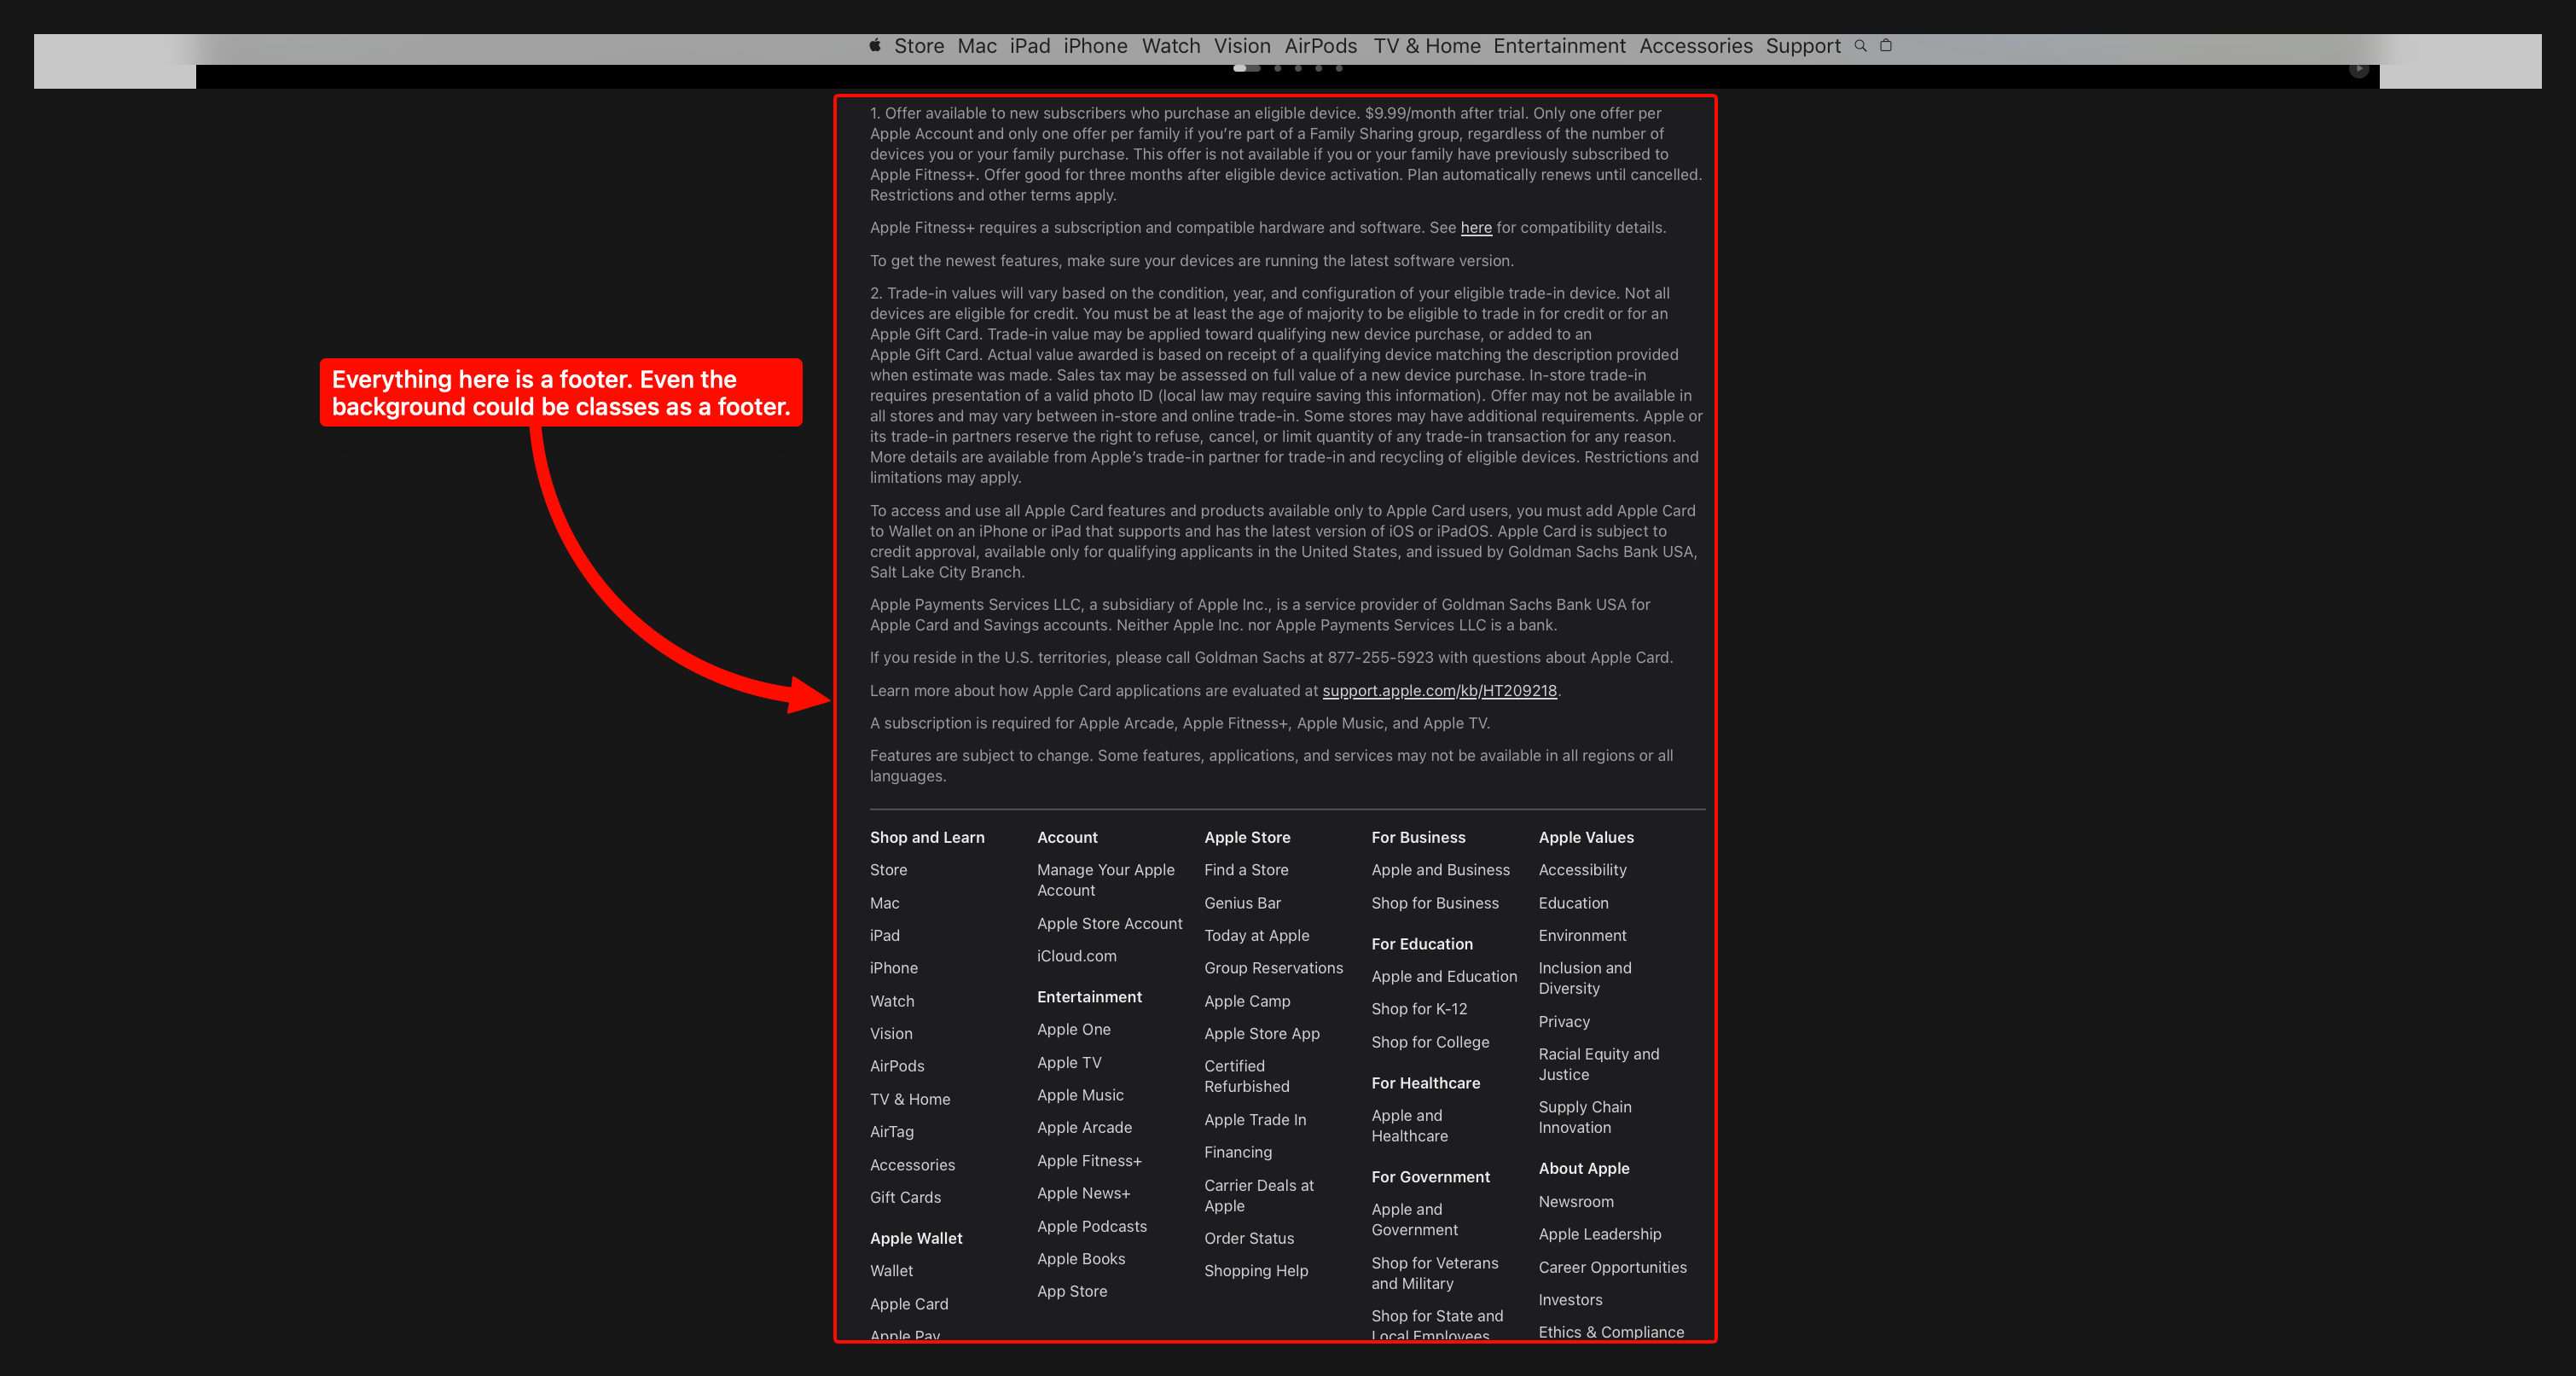
This image displays the entire footer for the ‘Apple’ website. Apple is one of my favourite websites when it comes to web development, I believe that they have some of the best UI and UX elements out of any company I’ve seen their sheer performance of modern integration is just amazing to look at and I would love to work on / for them. Whilst looking at the footer I instantly noticed the sheer size of it. Upon reading more of it I can clearly see everything that I need to and it displays everything to me perfectly. I love the design that they have gone for this footer, as when scrolling it is all centred on the page and nicely organised to meet my eyes when further reading. Overall, this footer is one of the most wordy and advanced pieces of work that I have seen and I wouldn’t change anything about
Overall - Website layout
Overall, creating a website is something which needs a lot of time spent on it, I believe that websites have to have everything I have mentioned from the Content to the footer. Everything needs to be available to be a successful website. After spending a long time looking into websites I can confidently say that looking into all of these different websites could show anyone how to create and design a website.
Lines 16 - 40
After taking the time to explain websites and their layouts I believe that I can now explain the rest of my code and make references to pieces of information inside of those paragraphs.
Let’s start with line 18. This line was something simple, It starts with a ‘Div’ element, and tags into a ‘class’ with text that reads ‘aboutmebackgroundblur’. This was the start of a long few days of me trying to figure out how to blur the background of my website when opening the ‘about me’ menu. This whole ‘function’ took me a while and a few other programmers to help me.
What Div is and What Div does
‘Div’ is an element inside of HTML which is usually known as a ‘generic container’. A ‘generic container’ is something that contains a small piece of information and or type inside of it. Referencing earlier, Div is the exact same as ‘nav’ and ‘header’. However, Div contains the same things with no preset and requires CSS. Whereas, for example ‘Header’ will contain things at the top of the page(by default and can be changed in CSS). Div can also have tags on the end of the text like a ‘Class’ this ‘class’ defines the name of the element (for CSS). Overall, div is one of the most used tags in HTML development, and if you were to look on any mainstream google page I guarantee you could see a long list of Div elements. I believe that ‘div’ is one of the best tags you can use and it has so much CSS potential.
Lines 16 - 40
Next is line 19, this line of code is another ‘div’ with two elements attached to it. These being ‘Class’ and ’Id’. Class is something I have already covered in a previous paragraph which is something that you can use to define a pre-existing element as a named variable. Id on the other hand is something that I haven’t gone over, Id is another way to name a variable however when referring to it. Then it can be called something else in the CSS so technically speaking if something had a class and an id then it could be referenced twice in the CSS document for two separate variables.
Lines 20, this element is called ‘H1’ in my code you will see a lot of ‘H’ elements. ‘H’ is used a lot of the time to define wording and usually titles. The ‘H’ being ‘heading’ and the ‘1’ being, the size(1 being the largest and 6 being the smallest). They are usually for when things are classes as ‘important’ so titles will be H1 - H2 whereas slogans and subheadings will be H5 - H6. This text also has a ‘class’ variable, and has some text between the two ‘H’ tags. When looking into the CSS I would rather use a ‘Class’ so I can use CSS easier.
Line 21, this line is a different one from what we have looked into before, this line of coder is ‘img’ this is an abbreviation of ‘image’ and all this line does is reference an image using file linking. For the next part ‘src’ this is a file linking type and it is used to links files by their file type. Example ‘image.png’ this would link the file which has the same name (and is in the same folder) to the line of code, so when this line is implemented in it shows the image. Next up is ‘alt’ this part of the text is for accessibility and screen-reading everything inside of the ‘alt’ tag will say to the screen reader whatever is inside of the speech marks. For the final two parts of this long line of code, we have class. Which I have covered (used to name things for easy use in CSS). Finally, we have a new element, called “draggable” this element is pretty self explanatory and is mostly used in CSS. This stops users from dragging the image accidentally and messing up their work. Personally I like this feature as it makes the code seem so much more refined. However, a lot of companies don’t use this feature. Overall, the IMG line of code is something simple but very effective and accessible.
Line 22 - 27 - Paragraph Tag
Next is line 22 - 27 is all the same thing (hence why I’m doing this whole section devoted to that and why I won’t be mentioning this tag again and reference back to this), lets begin on discussing what the ‘p’ tag actually means. The meaning of the ‘P’ tag is an abbreviation for the word ‘Paragraph’, this ‘P’ tag is a holder for text in a website. Most programmers use this element for holding paragraphs of text. This tag is very similar to the ‘H’ tags we talked about earlier, whereas this tag comes with a different preset of variables. ‘H’ tags(with no CSS) are big and bold text, whereas, ‘P’ tags are small and light(small text width and boldness) straight from inputing the tag. This(of course) can be changes in CSS later on for customising, however, ‘P’ is mostly to be unchanged as the present(unlike certain variables) is rather good. Overall, the ‘P’ tag is one of the most used tags in all of HTMl and CSS history as it is an essential function for websites to display information to the client.
Lines 28 - 35 - Button paragraph
This is another huge paragraph about elements which all have the same function, I will be linking back to this paragraph later on in my development diary. The element of the code is called ‘Button’ and this tag is something very self explanatory, it creates a button where if you click it(without any prior JavaScript which I will get into later) it will hand out a function. The button will be named based upon the text between both buttons. Next up is the class tag, I have already explained the function of this tag in depth in a previous paragraph, however, it is something that can name a variable for later CSS adaptations. This next tag is something that I haven’t explained at all before. This variable is called ‘onclick’. Again. This variable is self-explanatory, on the click of whatever is being defined it will carry out the function in the speech marks next to it. One of the final pieces of this line of code is called ‘location.href’ this is an extension of the ‘HREF’ element which I discussed before where it will refer and link to whatever path is placed between the two elements. In this case, links to personal websites. This command was used inside of my ‘About me’ section of my code which I mentioned in an earlier piece of my development diary. Second to last, we have ‘type’ this command is another accessibility command for screen reading, whenever someone hovers over the button, whatever is in the ‘type’ tag will be said to the screen reader. In this case, I have defined that as ‘button’. Honestly, I should have done that better and made it ‘home button’ etc, however I did not, which I am disappointed in myself for not doing. Finally, we have ‘color’, this is the most self explanatory part of these lines of code, and all this does, is change the colour of a website. (Also, I know I used the American spelling of colour, but in VSCode, it is an American application. So the use of color, is mandatory and is the reason why I have used it here.) Overall, these few lines of code play a big role in the presentation, colouring and type of button that this line of code plays.
Lines 35 - 40
Line 35 is a continuation of the last line of code and has pretty much no impact on the further code. Line 36 is where it starts to get more function based and important, not like the previous lines of code I have covered. The initial element is a ‘Div’ which I have covered multiple times in multiple paragraphs previous to this. However, a ‘div’ tag is something that can be used to further the production of CSS later down the line, it defines everything in it with ‘div’ instead of being nothing. Then it leads into a ‘class’ tag, which is another way to name something for again later CSS additions. Then, it gets onto a variable that I haven’t explained yet. This variable is called ‘style’ this tag works like CSS however, it has some features which CSS doesn’t, plus, it embeds it into the HTML so the HTML file (for that line) doesn’t have to call the CSS file. This line ends with an ID tag, which is another fancy way of calling the line a class. Overall, this line is rather insignificant, however, in the long run this line contributes to so much more than it’s originally worth.
Next up, is line 37, this is the final line of major importance before the ending 3 lines for this section of work. This starting element is a ‘button’ element, this element is as simple as it sounds and is the same of how I explained it before in the button paragraph(Im not going to go over the definition again as it is 2 paragraphs above it). It then goes onto an ‘onclick’ variable, which is something that when you click(whatever is under the variable) it will output a function, this time it is different. For this line it actually output a JavaScript function, and it calls it with the ‘hideaboutme()’ function name. This will call the JavaScript file and find whatever the script says inside of it then, executes it. I will go more into depth in the later ‘JavaScript’ paragraphs explaining all of my JavaScript code, however for now I will leave it at calling the function. Next up is a class variable, under the name ‘aboutmeX’(I know my naming is bad and I’m trying to work on it, this is something that will be fully addressed and changed later on) this will then be edited in CSS. Next is another element inside of the pre existing element. This is the ‘IMG’ element and this is displaying a small cross on the button. There are easier ways to do this. However, due to the time restraints, I did not have the time to optimise this website as much as I would have liked to. After the ‘img’ this is then followed with the ‘alt’ which is what I explained before, accessibility for screen reading, and for this I believe that my ‘alt’ text was quite good and self explanatory. This was then closed with the final variable ‘draggable’, this made it so the picture couldn’t be dragged off the page when clicking on to it. This was to prevent mistakes. Overall, so far this line has been the most important in the code, and some of the hardest for me to code myself, I spent a fair amount of time just learning how to do all of that for that singular button which will be looked over. However, I feel that it was worth it in the end as it looks good enough to present.
The Next 3 lines aren’t something that I should be explaining. However, I feel that I haven’t gone too much into depth about closing tags so I’m going to place that paragraph here. Lines 38 - 40 involve 2 ‘/div’ tags. The slash is necessary for closing tags. This makes it so the code can tell the difference between an opening tag and a closing tag. I used this twice here as both of the ‘div’s’ before this had not been closed(on purpose) this was then resolved by the implementation of the two ‘div’ tags. Overall, these lines seem silly and unused. However, they are needed for closing code, and giving good coding practice / presentation.
Overall, lines 16 - 40 are some of the most defined and visible lines of code in the whole website, and I believe that without these and their function, my website would have been a whole lot worse than it could have been. However, these were some of the hardest lines for me to code, due to the repetition, the layout and even more so the complexity of them.
Lines 40 - 61
Starting off with line 40 - 61, this is what that chunk of code looks like in VSCode:
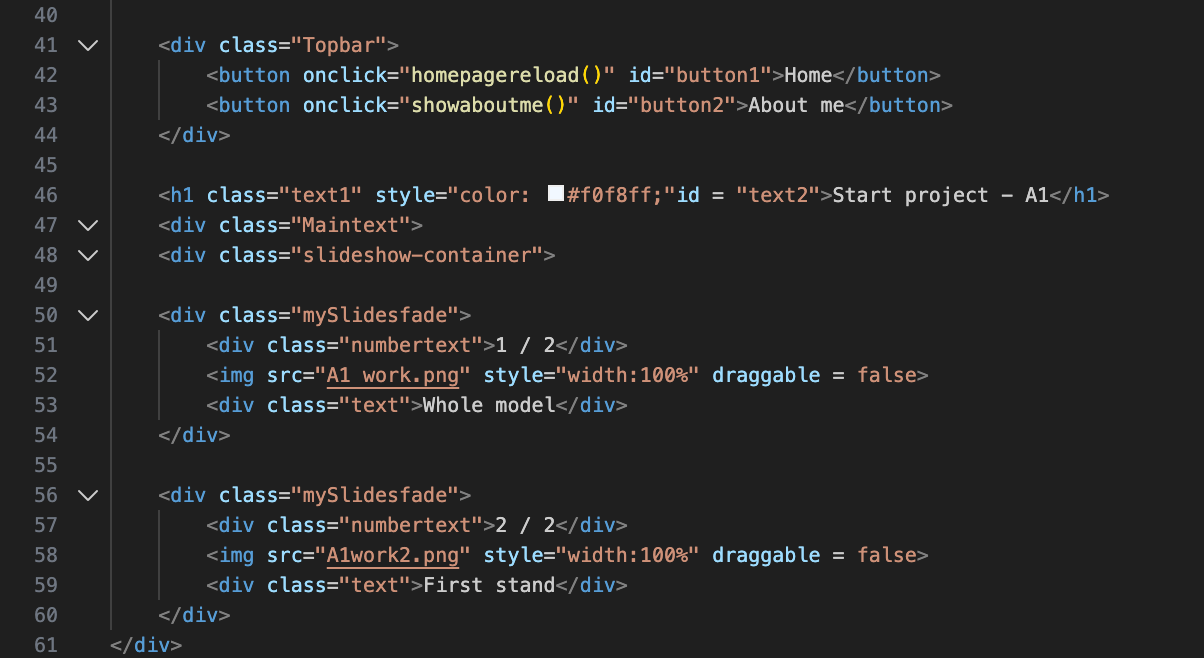
Beginning at line 41, this line of code is the start of some of the most important code. This line is a ‘div’ which is something that defines the rest of the line of code(and anything in between the other closing div aka. /div). Overall, this line is pretty useless. However, it is needed for wrapping around the variable that is on the next line.
At line 42 and 43 is where things instantly change. While being inside of the ‘div’ for CSS, these lines starts with a button. Hence the ‘div’ so I can customise the buttons later down the line. Next is the ‘onclick’ variable, these variables are used to define to the browsers when something is clicked it will output a function or whatever is inside of the speech marks. In this case, the variables are linked to a JavaScript function, which calls JavaScript, searches for the function and loads all the lines of code below it. Again. I will go more in depth later in the JavaScript paragraphs. To finish these lines of code off they are both ending with closing variables ‘Id’ this is just to name them for CSS and ease of use later for customisation. These elements are then closed with the ‘/button’ tag. Overall, these lines of code are very helpful as they begin the definition on the website and start to bring everything together.
Next is lines 44 - 48, these lines of code are very similar to what I have covered before so this paragraph is going to be less detailed than paragraphs before it. Starting off with ‘H1’ this tag has been covered multiple times over the last few paragraphs, however I will explain it slightly. ‘H1’ is the ‘title tag’ and is mostly used for big text titles at the top of screens / pages. Next up is a ‘color’ with a hex code next to it. Hex codes are another way of displaying colour to a computer, VSCode can see colours like ‘red’ however, you can still use the hex code equivalent for more specific colours. Additionally, it’s better practice to use hex codes as hex is more computer readable. Then to finish this first line it ends with an ‘ID’ tag which I have gone over multiple times. Line 47 and line 48 are the same thing with different text. They both start with a ‘div’ element, and then end with a class element. However, the difference is what lies within the ‘class’, they both say different things, indicating different CSS than the main body of the code. Overall, these lines of code attribute to everything below it and not themselves specifically, they will play a key role later in the closing of the code.
Up next is lines 49 - 54, this is for the main bulk of my work, and is in the ‘main content’ section, so this section will be seen the second someone opens up my website. To begin we have a ‘div’ element, this specific element will define the middle areas of the website, and I will use it to place all my text within this element and centre it in the middle of the page. The second line in this huge list of elements is also a ‘div’ this element is part of a class called ‘numberlist’ and it will control the number for the auto changing slides with all of my work later on down the line. Most of this process will be done inside of JavaScript. Next up is line 52, this line of code is purely an image line with a class variable. This specific piece of code is under the previous ‘div’ so when this code is executed it will be inside of the element. Second to last is another div, I have explained ‘div’ too many times in this so there is no point in me explaining it, so I will just go over what this specific one does. This div on line 53 is specifically for holding a small amount of text. I could have used a ‘p’ tag however, it would generally be bad practice. Overall, this small amount of code is overly insignificant compared to the rest of the code that I’m going to look into. However, even the smallest detailed in code can mean and do a lot more than people think.
Overall, lines 40 - 61 are mostly the start of the main chunk of code and they show some main features of the website, some lines in this code are necessary for the code to even look good and run.
Lines 61 - 76
Some of the last lines of code are lines 61 - 76, these lines of code look like this:
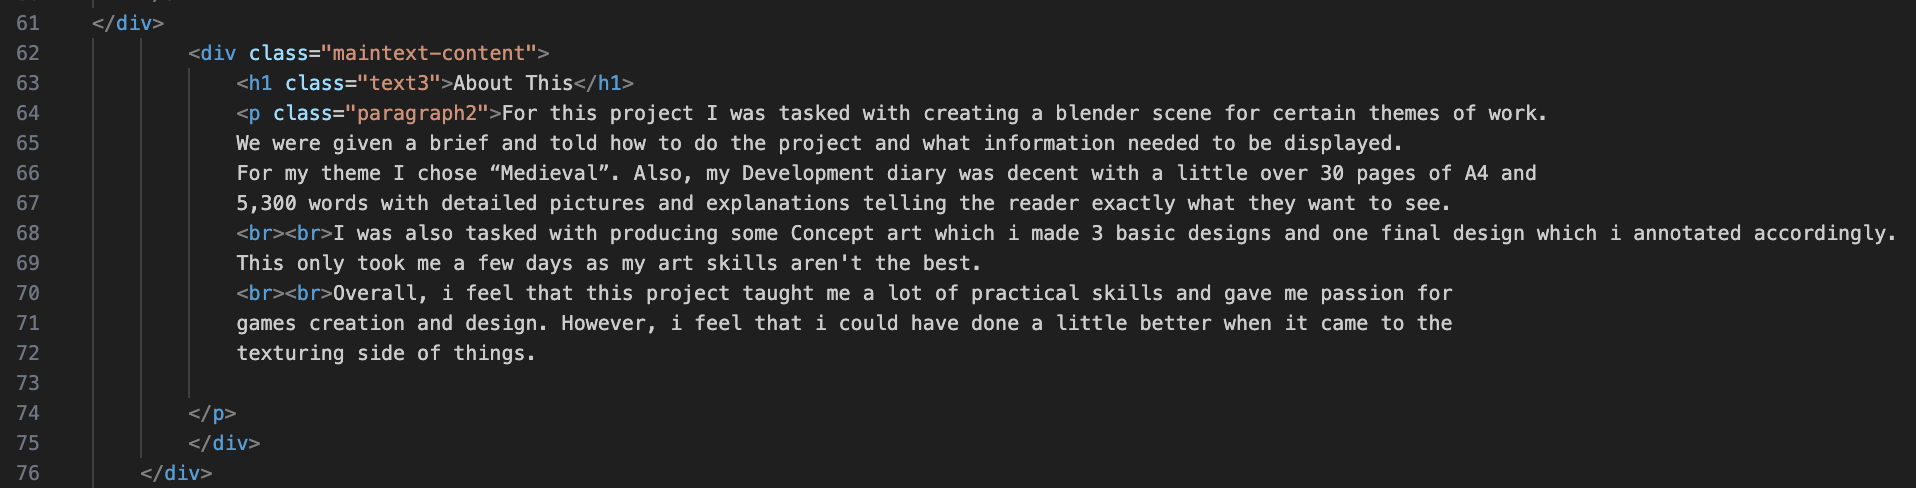
Im not going to lie, a lot of this image is going to be done in one paragraph. I have explained most of these elements before and their function. I’m just going to be going over what they actually do for the website.
Starting off, with line 62 a ‘div’ element. This encloses everything (in this paragraph) in the single element. This means that, when I change something in the CSS document, It will update everything below under the same ‘div’ element. Next up, is the last part of this code. Mostly because this next tag covers this entire part of the document. However, this tag is the ‘P’ tag, and it spans over an entire page. This specific ‘p’ tag has a few variables called ‘br’ inside of them, this is just a fancy way of saying break in a text(start a new line) which is better practice than using multiple ‘p’ tags for the same paragraph. Finally, the ending two lines are both ‘/div’ tags to close the ‘div’ elements above. Overall, this is the most insignificant line of code that I have gone over so far, and it is one of the easiest to write as all you need to know is ‘p’ and ‘br’.
Lines 76 - 127
These are the last lines of code in my HTML before moving onto the CSS section of my work. These lines look like this:
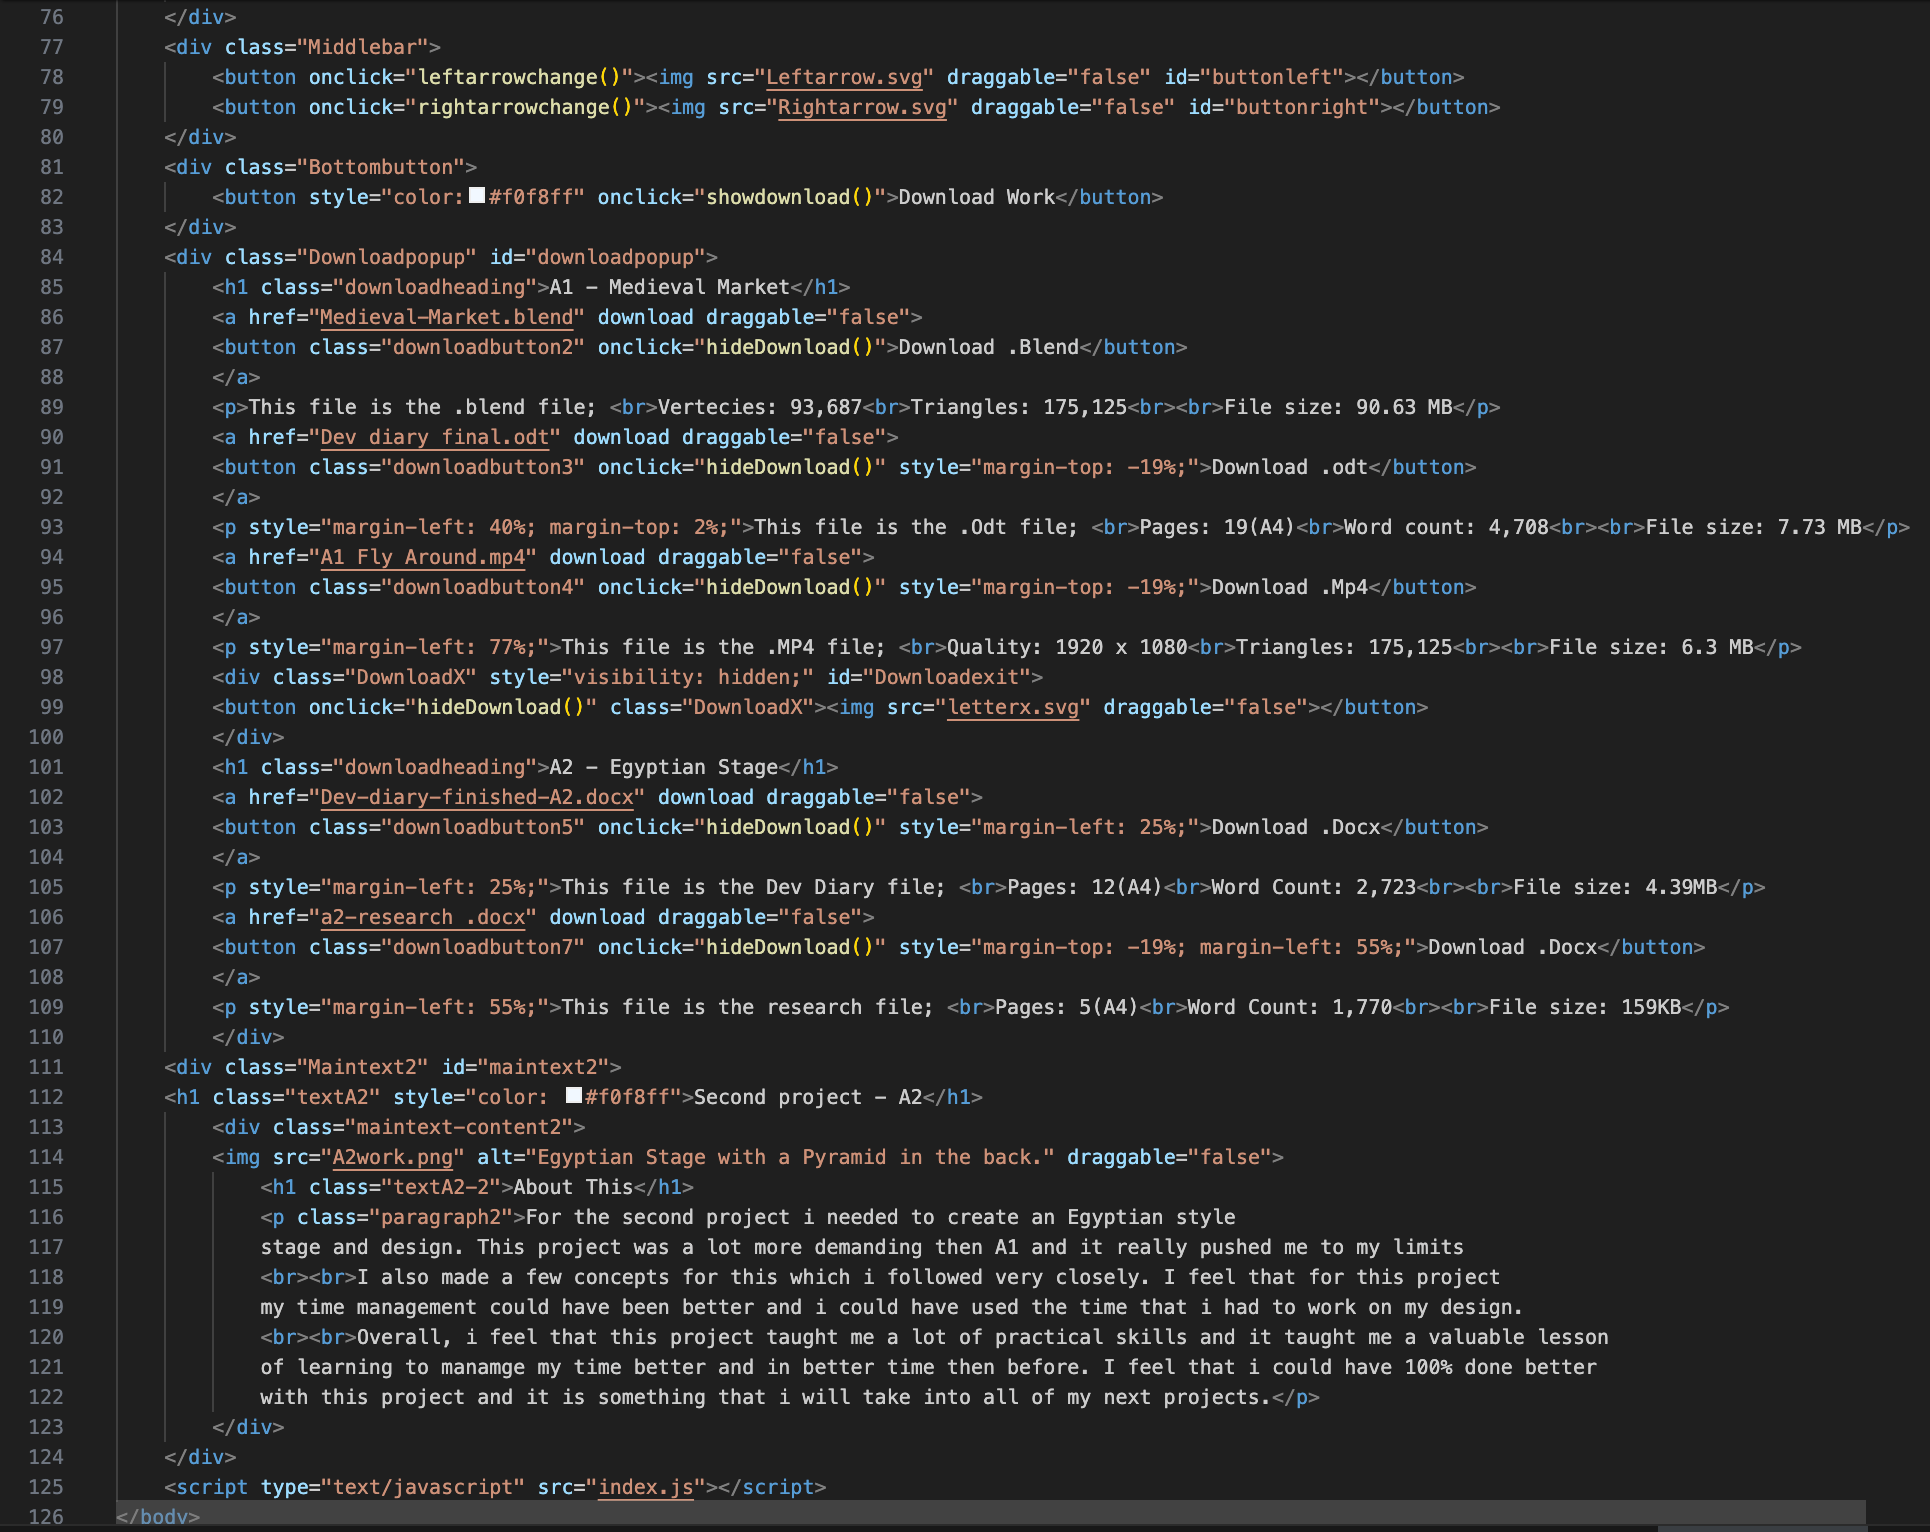
This image is showing all 51 lines of code, writing now I’m going to be less descriptive with a lot of the code, unless it is something that I have gone over. Starting from the top line 77 this is a ‘div’ element which is the container for the entirety of the ‘middlebar’ this is somewhere inside of my code which has two arrows located on it. This line will wrap around both arrows and complete the code. Next up is, lines 78 and 79. Both of these lines are the same thing just for a different named variable. They are both button elements with an ‘onclick’ function linked to them, this ‘onclick’ will call to the JavaScript file and execute the function. After this is line 80. This line is self-explanatory, it’s a closing ‘/div’ tag and it wraps around both of the previous buttons to enclose them inside of the ‘middlebar’ div.
Continuing from that line, this line(81) we have a ‘div’ element with a class tag of ‘bottombutton’ this (obviously) names everything below and in-between the two div tags that they are within the ‘bottombutton’. Next up is the actual functional button itself, this button (upon being pressed) opens the ‘downloadmenu’ which is a function inside of JavaScript (something I will get to later). Finally, line 83 is a closing ‘/div’ tag, this tag will close the ‘div’ element holding the ‘bottombutton’ class.
Next up, is a huge paragraph this is the ‘div’ all the way from lines 84 - 124 (which is most of this part). Starting off with line 84, this is a ‘div’ element with both a ‘class’ and an ‘id’ variable inside of it. This elements only purpose is to serve as a ‘pop-up’ inside of the website that upon clicking a button it will display on the screen. Line 85 is a ‘H1’ tag for a title, this is also within a ‘download heading’ ‘class’ variable. Next up is a new tag that I haven’t gone over yet, this tag is called the ‘a’ element. The ‘a’ element is described as ‘referencing a hyperlink’ so when using the ‘a’ tag it works like a normal ‘p’ tag. However, if using hyperlinks it’s better for professionalism, which is why I used this over the ‘p’ tag. This specific ‘a’ tag is linking to a blender file, so when someone clicks a button it will send them to downloading the file. Line 87, this is a traditional button element, all this does is contain a button and keep it under a class. The next line(88) is another easy one, this line is just for closing the ‘a’ tag, by using ‘/a’. Line 89 is a ‘p’ tag which is holding information about the blender file (hence why its below the blender download button) there are multiple ‘br’ tags inside of this element, this was for styling purposes. I could have done that inside of CSS however, it used less lines of code to put it inside of the HTML. Line 90 is another ‘a’ element, this hyperlink is referencing a word document download and it downloads then closes instantly. It also has a ‘draggable’ tag, this is so when clicking the button, the user doesn’t accidentally drag the link into their browser. Line 91 is another button tag, this button is for downloading the word document file, and upon pressing this button the download menu will close and the user will download the file. Line 92 is self-explanatory again, this line is a closing ‘a’ tag and ends with ‘/a’. Line 93 is a little different, it is an opening ‘p’ tag, however, it has a style tag next to it this means that everything between the two style tags change and overwrite the CSS. This then goes on to be a normal line of code with ‘br’ etc. Line 94 is an ‘a’ element, this element is for downloading a .mp4 file and is used for the video of all of my work. This then of course has ‘draggable’ as well, simply for user error. Next is line 95, this is a simple button, however, it has a ‘style’ element to it, just like its parent variable, this also means that it overwrites the CSS. Line 96 is another closing tag for the ‘a’ variable, I have explained this before. It looks like this ‘/a’ and closes the variable so everything between the starting ‘a’ tag is inside of it.
Lines 97 - 109 are the same thing I have just explained 3 more times. I could spend a whole paragraph talking about each of their function, but I would be dragging the document on. However, I will say that they are all in the same download menu and they do the same exact thing, the only difference is the wording inside of the ‘p’ tags and the ‘a’ tags. Overall, these lines add a lot of purpose to the code and give it functionality, I just feel that talking about every single thing would get boring.
Line 110, this is the closing ‘/div’ tag which states that everything inside of this will be inside of the ‘downloadpopup’ class. Then we move onto line 111, this line is the start of another ‘div’. However, this ones purpose is for the main bulk of the text on the screen, most things inside of this will be edited inside of CSS which I will explain in the CSS paragraphs. Then on line 112 we have a simple ‘H1’ tag which I have defined lots of times during these entire paragraphs. This specific ‘H1’ tag is for defining the top of a project and giving it a name.
Line 113 is the start of defining a secondarily large piece of content this is a ‘div’ tag and is being used for defining everything under it as a ‘class’. Starting off this relatively big chunk of code. Line 114, this line is dedicated to posting an image onto the page, this specific ‘img’ tag displays an image of my work onto the front page of my website, this is the first thing that someone would see when they login to my website. So ideally, this needs to be placed and dealt perfectly.
Lines 115 - 122, consist of a ‘H1’ tag and a ‘P’ tag, both of which I have covered multiple times. In this instance, the ‘H1’ tag is being used as more of a header than a title. Then, on the other hand the ‘p’ tag is being used for saying about the work in the image and what went wrong and what went right about it Etc.
Lines 123 and 124 are the same thing. They close the previous ‘div’ I have covered this before and they look like this ‘/div’. Overall, these lines are pretty useless except for the fact that they close the main tags.
Lines 125 - 127 are where it gets interesting and different. We start off either ‘Script’ which is a completely new element. This element is linking the JavaScript to the HTML, so when I write in the name of a function, it automatically knows where the JavaScript file is located and where the function is. This singular line of code is necessary for the code to even function. After all JavaScript is mainly used for functionality. Next is line 126, this is the closing ‘/body’ tag, this tag closes the body of the HTML and tells the browser that it has no more HTML let inside of this file left to look at. Without this singular line of code, the rest of the code wouldn’t even run so it is necessary for the website creation. Finally, is the closing ‘/HTML’ tag. This tag closes off and finalises the HTML document. A lot of programmers don’t use this. However, that is bad practice, you should always tell the browser at the start end and end of a document what type of file this is. Overall, these lines seem small to look at. However, their functions are greater than most lines of code in this whole document.
CSS
For CSS I’m going to do something different. Instead of me explaining all of the individual lines of code which would be silly as their is so many repeated values with different texts. Im going to explain all of the CSS variables and what they do.
CSS Explanations
Typography
-
font-family
This sets which font the website uses for all text, which helps keep everything looking consistent and avoids different fonts appearing on different devices. -
font-optical-sizing
This allows the font to automatically adjust how it looks at different sizes, which helps the text stay clear and readable whether it is small or large. -
font-weight
This controls how thick or bold the text is, which I used to help important text stand out more clearly from the rest. -
font-style
This sets whether text appears normal or italic, which can be useful for emphasis or separating certain types of content.
CSS Variables
-
–bgcolor-main
This variable stores the main background colour of the website so it can be reused easily and changed in one place if needed. -
–text-color
This variable controls the main text colour across the site, which helps keep the design consistent and easier to manage. -
–button-main
This stores the main button colour, allowing buttons to keep the same style throughout the website. -
–downloadbut
This variable is used specifically for download buttons so they are clearly recognisable and visually separate from other buttons.
Background Styling
-
background-color
This sets a solid colour behind elements, helping sections stand out and making text easier to read. -
background
This is a shorthand property used to set background colours or images in one line, which helps reduce repeated code. -
background-image
This places an image behind an element instead of using an image tag.
Spacing
-
margin
This adds space around an element, stopping content from being too close together and making the layout feel less cluttered. -
margin-left
This adds space to the left of an element, which I used to control alignment and positioning. -
margin-right
This adds space to the right of an element, helping separate elements horizontally. -
margin-top
This adds space above an element, which helps create clear separation between sections. -
margin-bottom
This adds space below an element so content does not appear stacked too tightly. -
padding
This adds space inside an element, stopping text or images from touching the edges and improving readability.
Sizing
-
width
This sets how wide an element is, helping control layout and alignment on the page. -
height
This sets how tall an element is, which is useful for buttons, images, and fixed layout sections. -
max-width
This limits how wide an element can grow, which helps keep content readable on larger screens. -
aspect-ratio
This keeps elements at a fixed shape, stopping images or popups from stretching when the screen size changes.
Layout & Positioning
-
display
This controls how elements behave on the page, such as whether they stack or sit next to each other. -
position
This defines how an element is placed on the page, allowing it to stay in a specific spot when needed. -
top
This moves an element down from the top when positioning is applied. -
left
This moves an element across from the left side of the page. -
right
This moves an element in from the right side of the page. -
bottom
This moves an element up from the bottom of the page. -
z-index
This controls which elements appear on top of others, which is important for popups and overlays.
Borders & Text
-
border
This adds an outline around elements, helping define buttons and sections more clearly. -
border-radius
This rounds the corners of elements, giving the site a softer and more modern look. -
text-decoration
This is used to add effects like underlines, which helps show headings or clickable links. -
text-align
This controls how text is aligned inside elements, such as centred or left aligned. -
color
This sets the colour of text, which is important for readability and contrast. -
font-size
This controls how large text appears, helping create a clear visual hierarchy.
Flexbox
-
gap
This sets space between items in a flex layout, keeping spacing consistent without extra margins. -
justify-content
This controls how items are spaced along the main direction in a flex container. -
align-items
This controls how items are aligned across the other direction in a flex container. -
flex-direction
This decides whether items are laid out in a row or a column.
Interaction & Effects
-
user-select
This controls whether text can be highlighted, which is useful for buttons where selecting text would feel unnecessary. -
overflow
This controls what happens when content is larger than its container, such as hiding or clipping it. -
transition
This smooths changes like hover effects, making interactions feel less sudden and more polished. -
transform
This is used to move, scale, or rotate elements, mainly for hover and animation effects. -
scale
This slightly increases or decreases the size of an element, mainly used for hover effects to show interactivity. -
box-shadow
This adds shadows to elements, helping them stand out from the background. -
pointer-events
This controls whether an element can be clicked or interacted with, which is useful for disabled or hidden elements. -
opacity
This controls how transparent an element is, often used for fade-in and fade-out effects.
Generated Content & Animation
-
content
This allows extra visual elements to be added using CSS without needing more HTML. -
animation
This applies a repeating or timed effect to an element, such as sliding images. -
@keyframes
This defines how an animation changes over time, controlling each stage of the movement. -
backdrop-filter
This blurs the background behind an element, which helps focus attention on popups or menus.
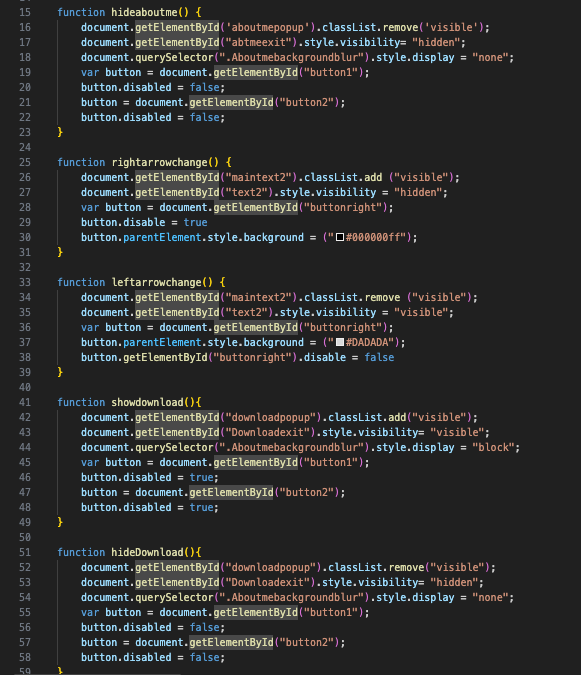
JavaScript
To begin with, this paragraph will be laid out like the HTML paragraph, where I explain each line of my code and what it does and how it works. Starting with lines 1 - 13, this looks like this:
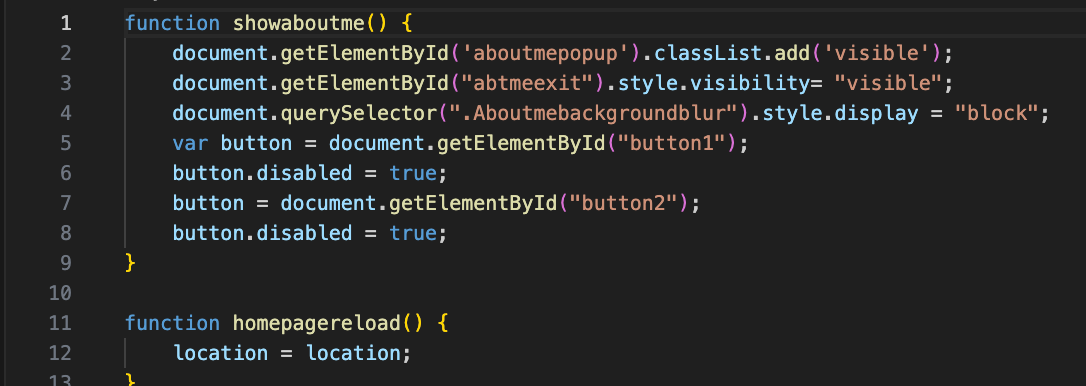
Lines 1 - 13
Line 1 is a function line, in javascript a function element defines the start of a function. Unlike in HTML, the name of the function doesn’t need to have speech marks around it. The second you start typing on the same line as the function that will be the name. This particular function is to hide a variable inside of HTML by changing the visibility tag. Line two is a ‘document.getelementbyid’ element, this element is self explanatory, it searches all documents for a specific ‘id’ tag inside of an element. If it finds the ‘id’ it will execute the function. Line 3 is the exact same as this so I will not be going over this. Line 4 is similar in the way that it uses the same starting ‘document’ however it then leads onto ‘queryeselector’ this is just a fancy way of looking for a class variable in HTML. Which then carries out a function. Line 5 is a newer function, this is a ‘var’ tag (also known as variable) and this tag is responsible for only calling certain variables inside of HTML. For example, this line is calling a ‘button’ now with no further explaining to this code, this would execute a function on the press of every single button, which isn’t what I want. So I used the ‘document.getelementbyid’ variable to search for specifics. This is very good practice as it shows that I’m not over working my code and running lines for no reason. Line 6 is something very easy (and that I won’t be going over again as it is very self explanatory) this is called ‘Button.disable’ and is defined by true or false answers. This variable does exactly what it says, it disables a button inside of the function and the specific one. The next and final ‘line’ that I’m going to be discussing for this specific part of JavaScript, is a button element. This then calls to ‘Getelementbyid’ and selects only specific buttons with that tag. Overall, this function is very important for my code and making sure it runs with actual purpose, and general function.
Line 11-13, I felt that this needed a micro paragraph written about it as if you don’t code this command isn’t self explanatory. Line 11 is simple. An easy function line with a name, which I covered at the start of the previous paragraph. However, line 12 is something different ‘Location = location’ upon first glance this looks like it would do nothing. However, this simple line of code adds more functionality than meets the eye. In javascript ‘location’ is equal to the sites location on the internet, regardless of the URL ‘location’ is whatever it is called. Now the ‘ = location’ just means that whenever the function is ran. The location will change to the location, in turn reloading the page. This line of code is so simple however so effective in production.
Lines 15 - 59
Lines 15 - 59. Honestly, I won’t be going over these lines of code, and this will happen a lot during these paragraphs. This is as this whole function I s doing the exact same thing as the first one, just in reverse. Let’s say for example you have a variable in one function which hides a button, you need to unhide that button later on of course, and for this you need a separate function. This leads to a lot of back-end javascript work being the same thing over and over again which can get repetitive. Overall, those lines of code mean a lot, however for explaining reasons I feel that it is pointless. This is what those lines of code look like:
Lines 61 - 74
Getting started with lines 61 - 74, this is what they look like:
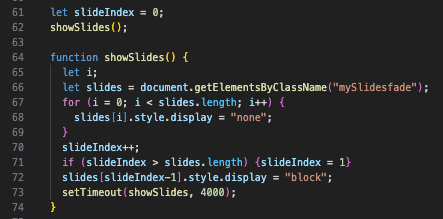
Line 61, this ‘let’ function, is something that I don’t fully understand yet, and it is something that I am still learning. However, what I do know is that this line of code sets a variable to 0 so it can later be changed by some additional JavaScript. Line 62, this is giving a name to the line of code above this one. It’s a very simple line but it gives definition.
Line 64, is where it gets familiar again, this is a normal function line of code and it called to the function created earlier. Then on line 65 this function is continued and called with the ‘let’ function, again, I can’t find very detailed explanations online, all I know is that it defines variables and is another way to define variables. Line 66, is another very familiar one this line of code is like what I have used before, this calls a variable by using the ‘document.getelementbyclassname’ function. This is the exact same thins as ‘document.getelementbyid’ however, instead of using the ID tag to find elements it uses the ‘class’ tag.
Lines 67 - 69 are all in the same function, this means that for as long as variable ‘I’ is equal to 0. Then ‘slides.length’ will always be bigger by ‘I’ plus 2. Line 68 closes this variable off by saying if slides is equal to ‘I’ then the display will be turned off. Therefore making this element invisible.
Lines 70 - 74 to finish the JavaScript and end my development diary document. Line 70 sets another variable called ‘slide index’ this is called straight after on line 71, which says that the element ‘slides’ (which is also ‘slideindex’) is bigger than ‘slides.length’ while slide index is equal to 1. To end this whole file off, Lines 72 and 74. Line 72 is saying that ‘slides’ is equal to ‘slide index’ minus 1. This then is saying that it will display as a ‘block’ code. Finally, line 73 - 74 is a small command called ‘settimout’ this small command just gives a slight delay in the function, so when it executes it will take a few more seconds to execute.
Overall Of Development Diary
Overall, I tried to expand on my development diary as much as could from the feedback I got from the resubmission. However, I feel that my time management is a big factor and something which is holding me back from better grades in projects. This is something which I will try and improve on my next project which will mean a lot more to my final grade. I do like some aspects of my development diary, like how much I go into depth about the code which I’m writing, as this shows that I know what I’m talking about and I’m not mindlessly writing lines of text over and over again.